使用 gitolite 具有更進階的資料夾管理功能,意思是我可以針對各別資料夾去指定誰擁有寫入或者讀取的權限。使用者仍然可以做 pull / push 等動作,但若是違背權限的規則,pull / push 的動作就會被 server reject。此外,gitolite的使用者權限是以 ssh key 來分辨,因此 Server 的系統只需要建立一個使用者帳號即可 (此例使用的帳號名稱是 git )
這篇記錄在 windows 上架設 gitolite 的步驟:
安裝 cygwin (Server Side)
1) 在 xp 上安裝 cygwin (http://cygwin.com/setup.exe)
2) 選擇 Install from Internet
3) 路徑及選項使用預設值
4) LocalPackage 暫存路徑使用預設值
5) 預設直接連線
6) 隨意選擇一個下載來源網址吧
7) 出現警告訊息,如果之前有裝過舊版 cygwin,至 http://cygwin.com/ 參閱此次安裝可能會影響到舊版的哪些內容,如果是第一次安裝就直接按確定繼續吧
8) 出現 Select Packages 畫面,選擇加入一些常用 package (bin) 列出如下:
a) Utils :: util-linux (2.21-1)
b) Utils :: screen (4.0.3-7)
c) Devel :: git (1.7.9-1)
d) Editors :: nano (2.25-1)
e) Net :: openssh (6.0p1-2)
圖片為勾選 Editor 底下之 nano 的 Bin Package
8) 安裝必要相關套件
9) 等待安裝完成
10) 完成
設定環境 sshd (Server Side)
1) 開啟桌面上的 Cygwin Terminal 捷徑
2) 設定 sshd:輸入 ssh-host-config
3) 出現 Should privilege separation be used 輸入 yes
4) 出現 new local account 'sshd' ? 輸入 yes
5) 出現 Do you want to install sshd as a service ? 輸入 yes
6) 出現 Enter the value of CYGWIN for the daemon : [] 直接按 Enter
7) 設定完成
設定 git 使用者帳號 (Server Side)
1) 在控制台 ---> 使用者帳戶 ---> 建立新的帳戶
2) 名稱輸入 git
3) 確定
4) 為 git 帳號設定密碼 ( ps. 吴波 指出 : "把git用户加入Administrators管理员组" ,可以解決在 Windows 2012 Server 環境下,ssh 無法 login 的問題 ! )
5) 在 cygwin terminal 裡輸入 mkpasswd -l -u git >> /etc/passwd
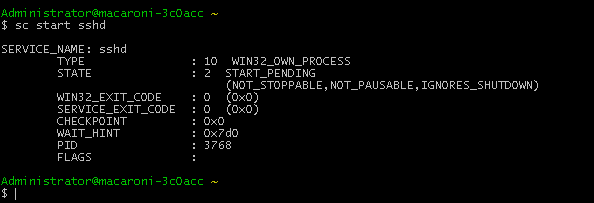
6) 輸入 sc start sshd 啟動 ssh server
7) 可以輸入 ipconfig 取得電腦的 ip 位址,後續設定會用到
安裝 gitolite (在 Client 端以 ssh 連線到 Server 來做設定)
1) 在 Client 端電腦 (通常是管理者的電腦,也可在 Server 端電腦上操作) 以 ssh 方式連至 Server,若 client 端是 windows 系統則可以使用 putty (http://chiark.greenend.org.uk/~sgtatham/putty/download.html) 來連線
2) 下載 putty.exe 執行畫面 (此例的 Server ip 是 192.168.11.7 所以在 Host Name 處輸入 192.168.11.7,Connection type 選擇 SSH)
3) 按下 Open 之後出現警告視窗,按是,則下次不再顯示此訊息
4) 提示 login as : 時輸入 git (使用者名稱)
5) 提示 git@192.168.11.7's password : 時輸入剛剛在 Server 端設定的密碼
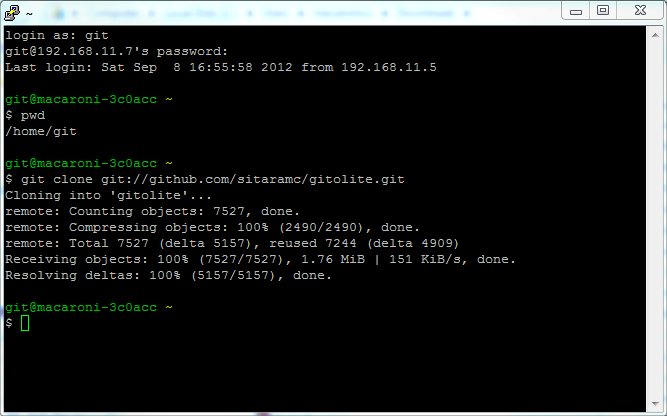
6) 剛登入所在路徑應該為 /home/git (可輸入 pwd 來確定)
7) 輸入 git clone git://github.com/sitaramc/gitolite.git (若無法成功可改輸入 git clone https://github.com/sitaramc/gitolite.git 試看看)
8) 確定 /home/git/.ssh/authorized_keys 檔案不存在或者內容空白 (輸入 cat /home/git/.ssh/authorized_keys 來測試)
設定 gitolite 管理者權限
gitolite 本身也使用 git 機制來管理權限,但只有第一個使用者 (管理者) 的設定比較麻煩,此例子是假設 Server 和管理者並非使用同一台電腦的狀態下做設定,換句話說管理者在自已的電腦上透過 ssh 來遠端連線到 Server 做設定
1) 安裝 git (http://git-scm.com) 此篇文章使用的是 1.7.11 版,安裝步驟可參考此篇文章
2) 在桌面上按滑鼠右鍵選擇 Git Bash
3) 輸入 ssh-keygen (出現所有提示皆按 Enter)
4) 將產生的 public ssh key 傳送至 Server,輸入 cd ~/.ssh 然後輸入 scp id_rsa.pub git@192.168.11.7:git.pub,其中 id_rsa.pub 為產生的 public key,git 為先前設定好的使用者帳號,192.168.11.7 為 Server IP,git.pub 為最後擺在 Server 上的檔案名稱
5) 提示出現密碼則輸入先前為 git 帳號設定的密碼
6) 輸入 ssh git@192.168.11.7 登入至 Server
7) 輸入 mkdir -p $HOME/bin
8) 輸入 ./gitolite/install -to $HOME/bin
9) 輸入 $HOME/bin/gitolite setup -pk ./git.pub
10) 輸入 exit 離開 ssh
11) 輸入 cd ~ (回到 home 目錄)
12) 輸入 git clone git@192.168.11.7:gitolite-admin ( 此時應可直接完成 clone,若被提示問密碼則代表先前的設定有誤)
13) 完成
新增 git repo (例如現在要新開一個 repo 名叫 newrepo)
1) 將 gitolite-admin clone 下來之後,打開 gitolite-admin/conf/gitolite.conf 檔案
2) 在底下新增
repo newrepo
RW+ = @all
意思是增加 repo 名叫 newrepo, 且所有 user 有有權利讀寫
3) 儲存之後依序 commit 並 push 就算設定完成了
新增 git user
1) 利用先前提的步驟,在欲新增的 user 的電腦上執行 ssh-keygen,然後將產生的 id_rsa.pub 複製到管理者電腦的 gitolite-admin/keydir 路徑底下並重新命名為 jack.pub (此處假設這個 user 叫做 jack)
2) 依序 commit 並 push 就算設定完成了 (假若 push 之後仍然無效則在 Server 端的 /home/git/bin 底下重新執行 ./gitolite setup )
設定 git user 之權限
1) 先前提的 RW+ =@all 代表所有人可讀取此 repo,若是改為 RW+ =jack 則代表只有 jack 這個 user 可以讀寫此 repo,詳細的設定可以參考 https://github.com/sitaramc/gitolite 連結的教學
2) gitolite 甚至可以限制 repo 裡的某些資料夾只有某些人可以讀寫:
RW+ = QA-guy
RW+ VREF/NAME/CHANGELOG =QA-guy
RW+ VREF/NAME/ReleaseNotes/ = QA-guy
- VREF/NAME/ =QA-guy
上面例子意思是 QA-guy user 只能讀寫此 repo 的 CHANGELOG 檔案及 ReleaseNote 資料夾底下的檔案。
此外,底下是吴波熱心提供的幾個建議提供參考 :
1) 開啟桌面上的 Cygwin Terminal 捷徑
Vista、Win7、Win8、Win2012等系统最好以管理员权限打开
6) 輸入 sc start sshd 啟動 ssh server
这步之后如果无法正常启动,查看/var/log/sshd.log,如果提示权限过大等,执行以下命令限制权限:
chmod 600 /etc/ssh_host_dsa_key
chmod 600 /etc/ssh_host_ecdsa_key
chmod 600 /etc/ssh_host_key
chmod 600 /etc/ssh_host_rsa_key
chmod 600 /var/empty
7) 可以輸入 ipconfig 取得電腦的 ip 位址,後續設定會用到
注意,可能要添加防火墙例外